Free $10

Join Strike and earn $10 when you sign up and verify your account using my referral code: BQANP2 ( https://invite.strike.me/BQANP2 )

Tuesday, October 18, 2022

GL.iNet Mini Smart Router Mango (Model GL-MT300N-V2) Thoughts

Lately most of my posts have been web3 related ( NFT / crypto ), but I decided to shift gears a bit.  I am not going to do a full deep dive review of this product, there are plenty online.  I did want to share my thoughts on the setup and use.

I purchased a Mini Smart Router ( Mango, model GL-MT300N-V2 ) from GL.iNet.  From time to time I would research OpenWRT compatible routers, and GL.iNet products would come up because they are OpenWRT based and many (but not all) seem to be supported by full OpenWRT releases.  I saw a good deal on Amazon and just decided to snag the Mango as a low cost entry point.

GL.iNet Mango ( GL-MT300N-V2 )

So first things first, I didn't have a pressing need for a travel router.  I have played around with OpenWRT on other devices ( RAVPower RP-WD03 and a Raspberry Pi 4 ) so I was familiar with the setup and use.  Ultimately I purchased the Mango as a cool gadget just for the fun of it.

Initial unpacking notes:
  • The device is small and light.  I expected it to be small, but it was lighter than I expected.
  • It comes with an Ethernet and USB-A to microUSB cable, which is a nice touch especially if you don't have many spare Ethernet cables.
Setup 1 - Initial setup

I didn't get creative here, I just followed the directions in the box.  My goal was to set the device up as a Wi-Fi repeater for my home network.  One thing to keep in mind, this device only supports 2.4 Ghz not 5 Ghz.  I was up and running pretty quickly with this option, the software is easy to setup.  Using Speedtest, my download speeds were a bit slower than connecting directly to my 2.4 Ghz network but still usable.  I looked around the interface, it seems much more user friendly than the LuCI interface on OpenWRT.

Setup 2 - Tethering

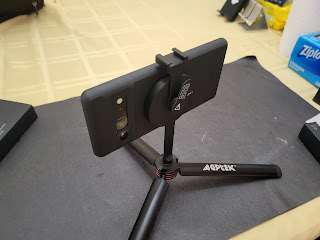
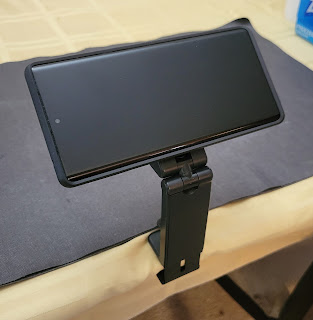
I wanted to try using the tether option via my smartphone.  Of course my phone can just run its own hotspot, but sometimes you just have to try things out.  I put my phone ( Pixel 6 Pro ) in USB tethering mode, and I was able to get it to work.  My first test had decent speeds, but that is because the Mango re-connected to my Wi-Fi (by default it will try to reconnect).  Once I disabled the reconnect option and tried again, I got the painfully slow speeds that I expected since my plan doesn't include high speed tether.  However the important thing is, the option worked.

Setup 3 - Access Point

For my next test, I just connected one of my extra LAN cables to the WAN port of my Mango.  I didn't have to change any settings for things to work.  I really like the fact that minimal configuration is required.

Android App

I checked the Play Store and an app ( https://play.google.com/store/apps/details?id=xyz.goodcloud.glinet ) that is actually pretty nice and seems to come from Gl.iNet.  From what I can tell you can access most of the same configuration options that you can via the web interface.  It has a "cloud" option that you can use to remotely connect/control, but I didn't test that.

NOTE: I tried to setup the Wi-Fi to support for WPA3 and after that I couldn't connect, luckily I just had to hold the reset down for like 10 seconds and set things up again which was easy.  Not sure why that didn't work, I will research it later.

VPN

This took a little more work to figure out how to figure, but I was able to configure the device as a VPN client.  The coolest part is that there is a switch on the side that you can use to manually turn the VPN on and off.

Additional thoughts

After using the device for a while and playing around in the interface, I noticed a few things that I thought were pretty neat:
  • The default setup seems to include mwan3 (Multi WAN load balancing).  So if you have Ethernet to one provider and Wi-Fi to another it can automatically switch between the two and I think it does some level of load balancing.  You can read up on that a bit more here ( https://openwrt.org/docs/guide-user/network/wan/multiwan/mwan3 ).
  • You can enable LuCI ( the default interface of OpenWRT ) to basically get more configuration options like you would with a traditional OpenWRT device.  This does not replace the GL.iNet interface which I actually like, it is just like adding a "power user" set of options.
Bottom line: So far I like the little router and might consider other GL.iNet devices in the future.

GL.iNet Product Page: https://www.gl-inet.com/products/gl-mt300n-v2/
Amazon Product Page: https://www.amazon.com/dp/B073TSK26W/

Friday, October 14, 2022

Floor - NFT Portfolio App

As I started to get more involved in the world of web3/NFTs, one of the areas I started to play around with was related to applications that let you see your portfolio of NFTs and wallet activity.

- Some apps would show the NFTs you own, and the total value of ETH but no activity.  If you had multiple wallets, you had to go into each one to see your view.
- Other apps did a good job of pulling all your collections into a single view or even showing collections, but not showing activity.
- I really like the Ledger Live app because I can see activity across multiple wallets on my Ledger, but it didn't really do a good job of showing my NFTs and it was limited to the Ledger wallets.  Most users that have a Ledger also have a software wallet, which was true for me.  So while I really like Ledger Live, I couldn't use it for my non-Ledger wallets.

So one day, in Discord (if your into web3/NFT chances are you hang out in many different servers) someone was sharing information on an app called Floor.  I like to try new things, and it seemed like it might work my goals so I decided to give it a shot.  For this app you actually have to have a pass, in the form of a NFT, so the person that shared the info actually send me a NFT to unlock the app.  This was already starting off to be pretty interesting!

So, how is the app?  Here is a quick walk-through (NOTE - I used a demo wallet address, these are not my NFTs.  Screenshots based on Android version 0.21.4) with some of my thoughts:

Portfolio - Owned

Once you have the initial setup done, the app will open up to your Portfolio view.  Not only does it show you an estimated portfolio value for your NFTs, it also shows your ETH balance.  You can add multiple wallets.


As you can see above, you can sort you collections by Floor Price, Average Price, Volume and % Change which is a great way to keep an eye the collections which you own NFTs for.  You can also watch any collections that you don't own NFTs for, just to keep an eye on them.

Portfolio - Owned ( Collection )

If you click on a collection, you get 4 tabs at the top (note if you are only watching a collection and do not own NFTs you get the same tabs except "Assets".

Overview: This shows some high level information, details about the collection and various links such as "View on OpenSea" to look at the collection.


Assets: This shows the NFTs you own in the collection.


Activity: This shows recent activity in the collection including listing and sales which is a great way to keep an eye on things.


Listings: If you are looking to add more to your collection, or buy an item from a collection you are watching, this view gives you a quick look at what is available.


Activity

In this view you can see all the NFT activity across your multiple wallets.


Discover

In the Discover view, you get useful information.  Two of the main items you use see are Biggest Movers and Highest Volume.  This is a great way to keep an eye on what new collections might be worth keeping an eye on.


Settings

Nothing too crazy here, you can add wallets and adjust a few display options to your preference.


What else?

One of the things I like about this app/project is that the developers seem very open to feedback.  I have submitted multiple tickets with ideas/suggestions, and they respond often asking for clarification to ensure they understand my request.  I doubt you will get that with many other tools.

So back to where I started, the person who granted me access was actually part of a program they have where people who want to share this app can share it with others.  If you read this far, then maybe you are interested in trying the app?  It doesn't cost anything - you don't even have to pay gas to get the NFT!

If you want my help, all I ask is that you sincerely have an interest in this type of application and that you plan to use it.  As far as I know, I don't get any sort of "kick back" for bringing a new person in - I just really like sharing useful information, which is really what drives me to post on my blog.

If I sent you this link, just let me know if you are interested.  If you ran across it randomly, keep an eye on this page and I will add a way to contact me.  You can also post a comment to let you know you are interested.  Let me know your twitter handle, and I will message you.

Saturday, September 17, 2022

ENS Subdomains

Earlier this year I wrote a blog post about Web3 identity.  At the time I touched on ENS, but didn't really dive into it much.

I finally decided to register my own ENS name, and one of the features I found pretty cool was the ability to create subdomains.  So let's say you register "example.eth" as your domain.  You could create a subdomain (in the format subdomain.example.eth).  You don't have to pay another registration fee, just a little gas.  You can even assign ownership of a subdomain to another person.

So why would you do this?  Here are a few reasons
  • You can make a .eth subdomain specific to a project ( blokpax.example.eth )
  • You can make a .eth subdomain specific to your Discord ID
  • You can make a .eth subdomain for friends/family
  • You can make a .eth subdomain for each wallet/purpose ( freemint.example.eth, vault.example.eth )
  • Each domain can have a different address and even different controller.
If you already have an ENS domain, you can create a subdomain by doing the following:
  1. Go to ( https://app.ens.domains/ )
  2. Click "My Account" top right
  3. Under either "Registrant" or "Controller" find the domain you want to add a subdomain to and click it.
  4. Click "Subdomains" and click "Add Subdomain"
  5. Put in the name you want and click "Save"
  6. Pay the gas and that is basically it.  You can now manage the subdomain like your main eth domain.
One heads up / warning.  If you get a subdomain from someone else (person or project) just keep in mind they have the ability to take the domain back.

I hope this information is useful!  I will revise/add info if I get any questions.

Saturday, September 10, 2022

Ledger Nano S Plus - Setup and initial thoughts

I recently obtained a Ledger Nano S Plus.  It was custom branded for Tribe X, one of the NFT projects that I am participating in.  The packaging was very nice and simple, it included the device itself, paperwork, a USB A to C cable and a keychain loop.


Setup - Initial setup

I went to www.ledger.com/start to get the process going.  For my first test/setup, I was just going to create a new wallet like a normal new user would.  The process went pretty smooth, and I was up and running on my Ledger pretty quickly.

A few recommendations:
  • Make sure you pay attention to the setup screen information, it is useful especially for a new user.
  • Make sure you write down your recovery phrase on a paper, do not store it in a file on your computer - that would defeat the entire purpose of an offline/cold wallet.

Setup - Recover prior software wallet

First, let me say that my next test was just a test and you should NOT do this for actual long term use of your device.  I already had a prior software wallet, so I decided to recover that wallet onto my Ledger.  This is a HORRIBLE idea from a security perspective since it defeats the purpose of a hardware wallet but for testing it was fine.  As expected all my old stuff showed up fine, so I plan to use this setup for testing to see how it impacts things for me.  Most of the services I deal with support WalletConnect, which is supported by Ledger Live (the desktop/mobile app that interfaces with the Ledger device).  I had one site that doesn’t support WalletConnect, but MetaMask did work.  The only thing I don’t like is you can’t get to the point of using Ledger in MetaMask if you don’t have a MetaMask account setup.  However for most users, they likely have a MM account so this shouldn’t be a problem.

FIDO U2F Support

While the Ledger is mainly focused on crypto, it does have a feature that users should look into a security capability for their online accounts.  The Ledger can support FIDO U2F (two-factor authentication).  You can read up on Ledger’s info on this feature here ( https://www.ledger.com/fido-u2f/ ).  If you read my blog, you know that I have tested Yubikey hardware tokens.  For the Ledger implementation, two things stood out as interesting:

  • The Ledger is PIN protected, so someone can’t use your hardware token if they don’t know your PIN.
  • You can restore your recovery phrase on another Ledger wallet and get access to your FIDO U2F again.
From a security standpoint the ability to recover your key onto another device means that if someone gets your crypto private key, they can restore onto a Ledger and also get access to your FIDO U2F so depending on how paranoid you are that might be a bad thing.  However it also means that, as long as you know your crypt recovery info you can always restore your FIDO U2F access on a Ledger device.

Thoughts so far

The increased security adds some complexity to the process.  If you are used to just having a software wallet like MetaMask, you now have to remember to keep your Ledger nearby.  However the increased security, keeping your key on a hardware device and not in your software, is worth it for anyone in the crypto/NFT world in my opinion.  Remember, this helps to secure your private key but you still have to be careful with the sites you interact with.  Ideally you keep your hardware wallet for “trusted” sites and never use it for minting and maybe do your minting type activities on a software wallet to keep some separation.  If you already have a software wallet, just move your valuable NFTs to your Ledger and keep using the software wallet for minting.

Sunday, April 10, 2022

Displaying your NFTs

Once you get into the world of web3/NFTs, sooner or later you are going to have at least a few NFTs that you want to let others see.  For a little background, as of right now my NFTs are on Ethereum and Polygon so my tests only consider those networks.  Note, I made sample galleries on each option but as time goes on I could end up no longer using certain options.

Unstoppable Domains (UD)

UD has two ways you can show off your NFTs:
One interesting thing about the NFT Gallery is that the gallery is created on a decentralized website, so this is also a chance to see a real example of how that works.  However, due to lack of Polygon NFTs or controls over which to show/hide, this isn’t an option I plan to use.

My UD Sample:
UD NFT Gallery: Go to the profile above and then click “Go” under “Website”

If you plan to set up your own UD domain, use my referral link to get $10 off with a purchase of $40 or more.  UD referral: https://unstoppabledomains.com/?ref=8dc35e49ca2d4a7

Nametag.org (NT)

Right now, Nametag is one of my favorite options for showing off NFTs because it is right on my NT profile which is sort of my web3 profile page.  There are a few ways you can show off your NFTs:
  • Your profile/avatar on your NT profile can be set to a NFT, and it doesn’t have to be from a verified collection.
  • You can select a NFT to be your profile background
  • You can pick multiple NFTs to show (or hide) so you can control which NFTs you share.
As of right now, NT doesn’t support Polygon but I believe it is in the works.  Additionally NT isn’t open to public minting, so you have to be part of a collaboration project to mint your Nametag.


Lazy.com

Unlike UD and NT which are more of a “profile” page with additional information, the Lazy.com option is just for NFTs.

Key points
  • Supports Ethereum and Polygon NFTs
  • You can hide certain NFTs so they don’t show up, and you can also “pin” a NFT so it shows up at the top of your page with a caption.
  • Not all my NFTs show up, so I think there might be an issue with my account or some limit of NFTs that it can pull in.  I reached out to support with no response, if they do respond and fix the issue I’ll update this post.
My Lazy Portfolio: https://lazy.com/vojimen

OnCyber

This one takes a unique approach compared to the other options I looked at.  Basically you are setting up a 3D/VR gallery to show off your NFTs.  I guess I like simple things so I wasn’t a huge fan, but the concept is cool and feels like an art gallery/museum.  I just don’t know if people will actually move around and look at everything, but maybe people are more patient than I am.

Key points:
  • Uses a 3D/VR style gallery, feels like an art gallery.
  • Supports Ethereum and Polygon NFTs
  • You pick which NFTs you show off, but it is a one by one process.

Bottom line: Ultimately there are many options to display your NFT collection, and the decision on which is best will probably be driven by personal preference and features that are important to you.  Don’t forget you can always just share your OpenSea profile if you don’t like the options above.

If you haven't seen my blog post about web3 identity make sure you check it out ( https://bigboystoys13.blogspot.com/2022/03/web3-identity.html ).

Links for the various options:

Friday, March 11, 2022

Web3 Identity

As I keep digging into the world of crypto / web3 / NFTs, I have started to run across various products that focus on giving you a username / presence online.  The basic idea seems to be that you own your username / web3 identity, and in some cases you can use that as a login to various services.  Of course due to the nature of web3 there is no true single standard approach / solution.  Most of the options I found tie to your crypto wallet, but they have their own features and capabilities.

ENS

I ran across one called ENS ( Ethereum Name Service ), and they have a really good explanation of what they provide ( https://docs.ens.domains/ ).  The concept behind ENS is very similar to DNS in the current day (web2?  legacy web?) technology.  Even if you don’t know what DNS ( Domain Name Service ) is, chances are you use it.  Anytime you visit a website name ( for example bigboystoys13.blogspot.com ) there is a DNS lookup in the background to get the server’s IP address.  Think of ENS as a similar service, but for mapping a friendly name to your web3 presence / crypto wallet.  Just like DNS, ENS has a yearly cost for registration plus you have to pay ETH gas fees so just 1 year could cost you about $100 but you could do 10 years for just $136.

ENS seems to be a main contender in this realm, but just to play around and learn things I also looked at other options out there.

Unstoppable Domains (UD)

After digging around, I found out that you can get a free test domain which really helped me test things out.  I registered my custom domain ( uns-devtest-vic-the-engineer.crypto ) and started to play around with the interface.  The domain is actually issued as a NFT that you can see on OpenSea and even sell if you want.  Here are a few things I was able to do:
One other interesting feature is that UD can be used to login to other sites, similar to how you can use Google or Facebook for that same purpose.  I ended up actually getting two domains (not just test ones) but I will also keep the test one for, well, testing.  With UD, you only pay a one-time cost for the domain itself - no minting fees.  While every record change normally would cost gas, that cost is covered by Unstoppable Domains for the domains on the Polygon network.

Use my referral link to get $10 with your first $40+ purchase: https://unstoppabledomains.com/?ref=8dc35e49ca2d4a7

.hmn Domain

I ran across this on Twitter.  Basically you can go to ( https://www.hmn.domains/ ) and it will give you the steps needed to claim a “username.hmn” domain where the username is your twitter username.  You end up getting a NFT sent to your wallet, but right now there isn’t much you can do with it as-is.  The company is working on adding some features down the line.

Once I got the NFT, I decided to click the “Claim on ENS” option which cost me gas.  On the plus side, apparently now I can manage it on ENS.  Any change you make seems to cost gas, but mine was already tied to my wallet.  So in theory someone could send money to me using my .hmn.eth address instead of my wallet address.

So I didn’t really plan to dive into ENS, but this gives me an END sub-domain which is pretty cool.  I think ENS domains can also have other features, I just haven’t set aside time to try them.  If I do, I will update this post.

Nametag (NT)

This one is different from the options above.  It is less about a domain name, and more about claiming your identity on web 3.  While the basic idea sounds similar to what I already have seen above, I think their landing page for users looks better than what I saw with Unstoppable Domains.  Ultimately, it seems like their goal is to support using your Nametag as a single user ID across various sites - which I think is a common goal for ENS and Unstoppable Domains.

I wasn’t sure what username to pick, so I decided on “Engineer” as something generic enough that I could sell if I wanted or keep and use.  You can list your own custom links, and you can give them custom names.  You can also display NFTs, as long as they are on the Ethereum side (not Polygon - but they are working on it).  Here is the page I have:


For now, regular users can’t get a name but they do open up opportunities so if you are interested make sure you follow them on Twitter and/or Discord.

Bottom line: There isn’t going to be a single “best” option for everyone - I plan to keep using all of them, and looking for other options in this space.  Depending on your needs and preferences, one of these options might float to the top of your list.  Just decide what your goal is, then figure out which one aligns the best.  Most, if not all, of these offerings are working on additional features so always check out their sites to see the latest information.

One of the coolest part of all 3 of the options (UD, NT and .HMN) I looked into, the name you obtain belongs to you as a NFT.  They all show up in OpenSea, and you can transfer/sell/trade your name if you want to.

Product links:


Tuesday, February 15, 2022

Moment Accessories

Disclosure of Material Connection: I received these products for free so that I could provide product feedback to the company and post a product review. I was not required to write a positive review and I do not rate products higher than they should have been. I am disclosing this in accordance with the Federal Trade Commission's requirements.

I recently purchased a Pixel 6 Pro, and during my research for case options I ran across the Moment case with (M)Force.  It seems like a pretty cool idea to have a magnetic case to allow for some creative mounting options, but once I started to look into Moment products a bit more I noticed that they used this mounting capability for more than just things like a simple device mount.  They provided a simple and secure way to mount accessories to your smartphone, and the case allows for attaching unique lenses.


Case for Pixel 6 Pro with (M)Force

When I purchased my Pixel 6 Pro, I went ahead and ordered one of the Google cases just to ensure I had a case on the phone.  Normally I get a different brand for my cases, but they didn’t come out with one I liked for the Pixel 6 Pro so I was looking around at other options.  Here were some of the key points I noticed with this case:
  • (M)Force allowing for magnetic mounting and attaching magnetic accessories 
  • Lens attachment piece over the camera
  • Textured back, making it feel more secure in your hand than the typical smooth back
  • Seems to provide better protection for the camera bump
I do wish Moment would have listed information about how they test their cases.  Other vendors often list their testing procedures, or they say that they are tested to "military grade" standards which normally refers to MIL-STD-810G.  While the case does have a target audience in mind, it still needs to meet the primary goal of providing protection.  I did find this page ( https://www.shopmoment.com/daily-essentials/phone-cases ) which says "Drop tested up to 6 ft" but that could they dropped it one time and that is it.

Packaging showing features on back

Directions

So as a case, it seems like this is a pretty nice case.  When you add in the extra features of (M)Force and the camera mounting, the additional features bring value to the table.  Even if you don’t have an immediate need for the extra features, it gives you future growth capability if you feel you might use those features one day.

My Pixel 6 Pro in the case

One other note, the magnetic part in the case doesn’t seem super strong - which is good, because I didn’t want to worry about my phone trying to attach itself to my wireless charger ( I gave it a test - it didn’t ).

Cold Shoe Mount - for MagSafe

Cold Shoe Mount with directions

Unfortunately I wasn’t able to do much testing on this one right now, but I see the clear value.  The cold shoe mount allows you to add things like a light or microphone to your phone which is perfect for mobile content creation.  The mount seems secure - I put it on my phone, and held the cold shoe mount part and the phone felt secure.

Tripod Mount - for MagSafe (Landscape and Portrait)

Tripod Mount with directions

The tripod mount takes the capabilities of the cold shoe mount, and for the “Landscape and Portrait” tripod mount model it adds a long bar at the bottom for the tripod mount.

There are many reasons you may need a stable platform to take pictures - two examples came to mind: you want to take multiple pictures of people with a consistent background, or you want to do a time lapse video.  To accomplish this, the cheap method is prop the phone up against something and hope it stays still - it probably won’t.

Luckily I had a portable 3 leg tripod mount to use for testing.  The Moment mount threaded on easily, and made a very stable platform for my phone.  I was able to run a test time lapse video, and even when I was touching the screen the platform seemed stable.  As a side note, I also used the tripod + mount to watch videos while eating - probably not the intended use case, but it was useful.

Tripod setup

If you want to use the mount for mobile content creation, the long tripod mount bar actually can serve as a handle.  While the tripod mount does cost more than the cold shoe mount, it gives you more supported use cases.  Pick the right tool for the job.

Wall Mount - for MagSafe

Wall mount

I have commitment issues, let’s just throw it out there.  The fact that this has 3M adhesive means that you are probably going to get a solid mount, but it also means you need to figure out where you want to use this.  It does include a 2nd 3M adhesive, and it can also be mounted using a screw hole in the middle which does make it secure but also removable.

Ultimately the use case depends on you and how it fits into your life.  It could be great for a content creation setup, or it could be useful in a home office situation.  With many phones offering hands free interaction, it really depends on what use case makes the most sense.

One other key factor, this is a magnetic mount.  It is sturdy, but you can grab your phone and go easily - no removing it from something like a traditional mount that uses pressure to hold the device in place.  I actually have an existing mount that clips to a desk, but it uses pressure to hold the phone so it wasn’t convenient to just grab the phone real quick.  I actually was able to put the magnet where the phone would go, and now I can just grab the phone easily if I need it.

Made an existing mount into a magnetic one

One other note I learned the hard way - the magnet on this (and probably the other attachments) is very strong.  I put this on my fridge - I meant to put the "weak" side on to see if it would stay up, but I put the phone side on.  I couldn't remove it.  I had to slide it down until the magnet got to the edge of the door then I was able to pull it off.

Tele 58mm Lens

Lens with cover and case.  The cloth under it wasn't included.

This is where a photographer is going to really start to enjoy what Moment has done with their products.  Not only do you get a phone case that happens to bring magnetic magic to it, but it also lets you attach lenses.  It isn’t a complicated process, and it is easy to put on / take off allowing you to get the quality shots you want and then put it away safely.

To test the lens, I immediately went outside to take pictures of a large radio tower visible from my backyard.  I tested taking the same picture without and with the telephoto lens.  While I knew what I should expect, it was still impressive to see the additional zoom with no clear reduction in quality.

Take a look at my comparison pics below, but also make sure you check out the Moment website ( https://www.shopmoment.com/photo-and-video/lenses/phone-lenses ) to see a wide variety of lenses and some very good comparison pictures.

Pixel 6 Pro - Lens not attached

Pixel 6 Pro - Lens attached

Overall thoughts


I am impressed by the Moment set of products.  As far as the case itself, it is a bit more expensive than other cases but it adds features most do not have.  As a consumer, protection of my device is the most important thing so it would be good for Moment to provides details on their testing methods.

The Moment series of products stand out because of the extra features their cases provide - the MagSafe compatible (M)Force and the lens attachment.  Even if you don’t need that stuff today, buying a case like this helps future proof your investment.  I have already started looking at accessories that attach using magnets such as portable batteries that can attach to the back and provide wireless power - I don’t need it today, but I see the value.

Ultimately this case would be great for the average consumer, but opens up other features that content creators, power users and other professionals can appreciate.

Product Links:

Friday, February 11, 2022

NFTs - Getting started with Blokpax

Post last revised February 15, 2022

UPDATE: There is a Blokpax Lighting Drop happening Feb 22, which is a great chance to start your experience.  Link to more info is at the end of the post in the "Recap" section.

I recently made a blog post about NFTs ( check it out ), and had Blokpax as one of my examples.  I decided to pull together a post to help anyone interested in getting into NFTs that likes the idea behind Blokpax.  Instead of trying to develop all the instructions myself, I am going to leverage existing guides as much as possible.  If you ran across this page but are not familiar with Blokpax, I would suggest you go here first ( https://blokpax.com/faq ) then come back.

Sample Infinite Moment (IM)

High level these are the steps you will need to take:
  • Sign up for Blokpax
  • Create a wallet
  • Setup OpenSea
  • Join Discord
  • Enjoy the magic
I would recommend following these steps on whatever device you plan to use most - so if your going to use your computer, set it up there.  If you will be on your phone, set it up there.

Sign up for Blokpax

As of right now, there is a promotion going on where new users will get 5 free starter packs for an upcoming drop that should happen on February 22, 2022.  Here is my referral link if you would like to use it:


If someone else referred you, then feel free to use their link so I don't take their referral.

Create a wallet

If you don’t know what a crypto wallet is, read up on it here:


If you just want to use MetaMask ( which seems to be the wallet recommended by Blokpax ) go here:


If you want to look at other wallet options this page shows a list of OpenSea compatible wallets, but keep in mind it might not provide the same experience


NOTE: Make sure you link your Blokpax account with your wallet.  If you use the MetaMask directions above, the steps are listed on that page.

Setup OpenSea

Once you have your crypto wallet ready, you need to set up your OpenSea account - this is where you can buy/sell/trade the NFTs.  Go to the link below and follow the steps under the “3) OpenSea” section:


Join Discord

The Blokpax Discord is a great place to find information, ask questions and trade with others.


If you need to understand why Discord is important, check this page out:


Recap

If you follow the steps above, you should have enough to get you started in the right direction.  If you plan to make trades or purchases, you will need to continue to read up.  Here are some suggested sources of information:

Lightning Drop 1 Info - Details on the upcoming (Feb 22) razz drop.

https://opensea.io/collection/infinitemoments - Check out Infinite Moments (IM) cards which is one of the main aspects of Blokpax.

https://blokpax.substack.com/  - This page has multiple useful guides.

Discord - On the Blokpax discord there are multiple channels with useful information under the "New 2 Blokpax?" heading, I would recommend you go through each one!  If you still have questions, there is a #questions-and-answers channel.

Other useful information

I will update this section moving forward, but for now the steps above should get you ready for the next free drop.

Tuesday, February 1, 2022

NFTs - My thoughts

Like most people, I have been hearing plenty about NFTs.  Since I like technology and trying new things, I decided to start digging into things a bit more to get a better understanding.

What are NFTs exactly?

Ok so the obvious question for someone new - what are they?  You can do a google search and find plenty of information on what a Non-fungible token (NFT) is but I’ll summarize it in a way that hopefully will make sense to you.  Think of it as a digital receipt / proof for something unique that you purchased online.  So that leads to the next question, what exactly can you purchase as a NFT?  Well this is where it gets very interesting.

NFT for digital art

The most common use case that you will see right now, at least that I have seen, is digital art.  You might be buying the ownership of the actual art, or just rights to use it.  Like any artwork, I think you will have two main groups of buyers to consider - 1) people that are getting into the art because they want to keep the art, and support the artists and 2) people looking at it from an investment perspective.

The really interesting part is that anyone can create and sell NFTs.  To test this theory, I actually went down the path of listing a picture that I took (and own) as a NFT on OpenSea which is one of the popular NFT marketplaces.  For an artist, this opens the opportunity to get their work out for potential purchase.

Other NFT uses - in practice

I actually ran across a very interesting NFT use case from a company called Blokpax.  I signed up and got 40 free NFTs they call Razz cards.  Those Razz cards are typically tied to a real world trading card - think sports cards, or Pokemon cards.  So using an example of some high value Pokemon card, it has 2048 associated “Razz” cards.  They do eliminations, cutting the pool in half each time ( 2048 -> 1024 in the first round ).  Your Razz might get burned or it might survive until the next around.  If your Razz is the last card left, you get a “Vault Token” which is tied to ownership of the card.  You can have them ship you the card, or you can sell/trade the “Vault Token” to someone else to transfer the ownership of the real card.  I think this NFT use case has great potential to get attention from people.  It was pretty fun trading Razz cards with other people to try to get multiple entries for the same real world card.  The first round of cuts happened earlier today, so I’ll update this article to say how it went.

Update: I traded most of my Razz for Infinite Moments (see below) and the few I had left didn't win, but it was still fun.

One of my Razz tokens

The same company, Blokpax, also has a different collection called “Infinite Moments” which are tied to moments in history, mainly sport related but other events too.  These NFTs are not backed by a “real world” equivalent card, but they were still an interesting part of the overall Blokpax experience.  These are closer to art or digital trading cards in the sense that you might buy/trade them as a collectors item.  I believe the company is also planning to ensure holders of Infinite Moments (IM) cards will get certain benefits - for example “Elite Drop 1”, which happens 6 Feb 2022, will give each IM holder a free Razz for each IM they own.

Update 12 Feb 2022: I wrote a new post about getting started with Blokpax ( https://bigboystoys13.blogspot.com/2022/02/nfts-getting-started-with-blokpax.html )

One of my "Infinite Moments" cards.

Another Infinite Moments (IM) card example

Other NFT uses - in theory

There are so many potential use cases for NFT it is just a matter of which ones really gain momentum.  Again, just because I wanted to try it out, I actually listed an idea - yes an idea - as a NFT.  I basically laid out a problem, and if you buy the NFT you will get the solution.  This was just another example of me testing things out to see if it was possible.

Another area that many people are talking about is video games.  Today, for example, you can buy many things in games but most do not provide a way to sell or trade them.  With NTFs, it could give you more control but I think gaming companies will be slow to adopt because secondary sales could cut into their profits especially if they rely on microtransactions.

Other thoughts?

Getting into NFTs is complex.  Just dealing with so many options - crypto wallets, networks, marketplaces etc.  Other bumps like moving money around might incur some crazy fees.  There are also a ton of scams out there - I ran across at least one link that seemed like a support request but if you put the information in, they could gain access to everything you have.  With crypto, if someone gains access to your wallet they can steal what you have and you are out of luck - much like cash in a real life wallet.  I think, as NTFs continue to find use cases that people are interested in and work on making the technology easier to use, the adoption will continue.

If you are interested in getting into NFTs, start off by thinking about what type of project you are interested in - if you are into trading cards (either sports card or Pokemon) then Blokpax might be a good starting point.  After that, do your research and move slowly.  Remember that in most cases there is no guarantee that you can sell what you purchase for a profit (or at all), so only use money you are willing to risk.  If you can, find friends or someone you trust that is willing to help you get moving in the right direction.

Links of interest: