Thursday, August 13, 2015

1Sheeld Review

Disclosure of Material Connection: I received the 1Sheeld, SainSmart, and DIYmall products for free so that I could provide product feedback to the company and post a product review. I was not required to write a positive review and I do not rate products higher than they should have been. I am disclosing this in accordance with the Federal Trade Commission's requirements.

NOTE: For readers of my blog, you can use the discount code "bigboystoys" (which expires September 20th, 2015) to get a 25% discount at ( http://1sheeld.com/buy ).

I recently received a 1Sheeld for Arduino and Android for a product review. The package just included the 1Sheeld device itself, the documentation and Android software is online.

This product is very interesting, because it allows you to use your Android smartphone or tablet to act as various shields for your Arduino device.  This approach can help the new user simulate various input/output devices without actually wiring any hardware or allows the experienced user to make some creative projects.

Top of 1Sheeld

Bottom of 1Sheeld
The shields that this 1Sheeld can emulate are grouped as follows:

Basic I/O: Buzzer Shield , Gamepad Shield , LED Shield , Toggle Button Shield , Seven Segments Shield , Slider Shield , Push Button Shield

Communication: Email Shield , Skype Shield , SMS Shield , Phone Shield , Internet Shield

Sensors: Accelerometer Shield , GPS Shield , Gyroscope Shield , Mic Shield , Proximity Shield , Magnetometer Shield , Pressure Shield , Gravity Shield , Temperature Shield , Light Sensor Shield , Orientation Shield

Social Media: Facebook, Twitter, Foursquare

Special: Camera Shield , Music Player Shield , Notifications Shield , Terminal Shield , Text-To-Speech Shield , Voice Recognition Shield , Keyboard Shield , LCD Shield , Clock Shield , Pattern Shield

I used the getting started tutorial ( http://1sheeld.com/tutorials/getting-started/ ) to get everything setup and tested.  If you see a prompt about an update, go ahead and update your board.

Arduino UNO R3 w/ 1Sheeld, OLED display and Nexus 7 running 1Sheeld App

Close up of x/y/z axis information from accelerometer
Left : OLED information is from Arduino/1Sheeld
Right : Nexus 7 screen from 1Sheeld app
Once the 1Sheeld was mounted on my Arduino board and everything was working, I started to play around with various examples and try a few different things.  Here are a few things I tried:
  • Tested the advanced “Text to speech” sample which shows the text-to-speech and voice recognition capabilities.
  • Created sample code to pull GPS coordinates and display and the LCD shield
  • Tested the simple “Internet” sample which connected to a website and displayed the HTML code in the terminal shield
  • Pulled x/y/z axis information from accelerometer, displayed on a small OLED screen (as shown above).  My Arduino code had a delay between sampling, so the numbers do not match exactly.

Bottom line: Overall, the 1Sheeld is very impressive - you can use it to mock certain hardware components in projects before you actually setup the hardware or you can actually use your smartphone/tablet as part of your project - a great way to give new life to an old device.

1Sheeld Product Page: www.1sheeld.com
1Sheeld Amazon Product Page: http://amzn.com/B00L2LM3WY

NOTE: For readers of my blog, you can use the discount code "bigboystoys" (which expires September 20th, 2015) to get a 25% discount at ( http://1sheeld.com/buy ).

Other components used/mentioned:

OLED from DIYmall ( check out my review )
Arduino UNO R3, breadboard and jumpers from a SainSmart Basic Start Kit ( check out my review of the kit )


Tuesday, August 11, 2015

JBtek 4 Channel Relay Module with 6 pin cable Review

Disclosure of Material Connection: I received this product for free so that I could provide product feedback to the company and post a product review. I was not required to write a positive review and I do not rate products higher than they should have been. I am disclosing this in accordance with the Federal Trade Commission's requirements.

I recently received a JBtek 4 Channel Relay Module with 6 pin cable for a product review. The package just included the relay module and the 6 pin cable.  One of the plastic covers on the pin was missing, but that wasn’t an issue for me and the company advised they would resolve the issue if needed.

Relay Module and Cable
Close up of connection to control relays
Close up of connections that are controlled by relay
 The relay module did not have any documentation with it, so I had to do a little research online to figure out how to use it.  The board pins were labeled, but I wasn’t sure what signal to send to the relay pins -- it seems you need to connect the pin to ground/low signal to active the relay.
Close up of Songle SRD-05VDC-SL-C relay

Bottom of relay module
Each of the 4 relays has a normally open and normally closed connection, so you can decide which one you need for your project.  Each relay also has a corresponding LED on the module which is a great way to confirm which one is active/not active.

Using my Arduino board, I was able to do a few simple tests and have the relays turn off and on just to ensure everything is working.

Testing the relay module with a JBtek breadboard power supply
Here are the main points I noticed about this product:

Easy to Wire: Wiring everything was fairly simple, the connections you need on the relay module for power and signal have pins you can connect to and the connections controlled by the relays have screw terminals.

Easy to Use: Once you connect the power, you just need to use a switch or microcontroller to provide the correct low/ground signal to active the relay.

Neat for projects: This relay module allows you to control power to other devices, opening up a wide range of potential projects.

Bottom line: If you are looking for a relay module, this is a great option to consider and JBtek has other options ( 2 channel and 8 channel ) to match your needs.

Amazon Product Page: http://amzn.com/B00ZEETFZS

Sunday, August 9, 2015

DIYmall 0.96" inch yellow and blue OLED display module review

Disclosure of Material Connection: I received this product for free so that I could provide product feedback to the company and post a product review. I was not required to write a positive review and I do not rate products higher than they should have been. I am disclosing this in accordance with the Federal Trade Commission's requirements.

I recently received a DIYmall 0.96" inch yellow and blue OLED display module for a product review. The package just included the display itself, nothing else.

Size comparison with a quarter
The display is very small, and this model has a strip of yellow on the top part of the display and the rest is blue, but DIYmall does have other options if you don’t like that.  After doing some guesswork and research, I was able to get the display working using method 1 below but after reading other review comments, it seems method 2 below also works.

Method 1)

Here are the steps I took to get my display working for some simple steps (I think I wrote down all the steps NOTE: The steps are for an Arduino Uno):

1) Download documentation from website on Amazon listing
2) Extract Files
3) Open the folder that ends with (SSD1306), it should be the only folder
4) Open the folder that starts with Arduino and ends with (UNO)
5) Open the top of the two folders, it should have a "Adafruit_ssd1306syp"
6) Copy the "Adafruit_ssd1306syp" and paste it in the "C:\Program Files (x86)\Arduino\libraries" folder
7) Open the Arduino app, go the menu "File > Examples > Adafruit_ssd1306syp" and choose "ssd1306syp_test"

Once the software is ready, wire up the hardware as follows:

VCC <> 5V
GND <> GND
SDA <> Digital 8
SCL <> Digital 9

Method 2)

In the Arduino app
- Go to menu option "Sketch > Include Library > Manage Libraries" and install "Adafruit GFX Library" and "Adafruit SSD1306"
- Go to menu option "File > Examples > Adafruit SSD1306 > ssd1306_128x64_i2c"
- In the example, find the line with "display.begin(SSD1306_SWITCHCAPVCC, 0x3D);" and changed it to "display.begin(SSD1306_SWITCHCAPVCC, 0x3C);"

Once the software is ready, wire up the hardware as follows:

VCC <> 5V
GND <> GND
SDA <> A4
SCL <> A5

After following either method, you should be able to load and run the sample.  They both worked fine for me.  I think method 2 takes up more space when you compile but gives more functions - seems like method 1 has less capabilities, but for simple text output it works fine.  Part of the fun of all this is figuring things out, so try them both.

Simple volt meter
Once I finished my initial function test, I modified the code for method 1 to make a simple volt meter (0-5V) that would read the voltage and display it on the screen.  I connected the voltage input to a potentiometer, and was able to see the voltage change on the screen as I adjusted it.

Overall, it worked and was really simple to wire up the hardware.  Figuring out the software was a bit more interesting, and I still need to do more research to find other examples of what you can really do but for anyone doing projects this is a great way to display variables or even status messages.

Bottom line: If you are looking for display options for your microcontroller project, this is a really neat option.

DIYmall Product Page: http://www.diymalls.com/product/modules/16.html
Amazon Product Page: http://amzn.com/B00O2LLT30

Tuesday, August 4, 2015

RAVPower 13000mAh Deluxe Series External Battery Pack Review ( model RP-PB22 )

Disclosure of Material Connection: I received this product for free so that I could provide product feedback to the company and post a product review. I was not required to write a positive review and I do not rate products higher than they should have been. I am disclosing this in accordance with the Federal Trade Commission's requirements.

I recently received a RAVPower 13000mAh Deluxe Series External Battery Pack ( model RP-PB22 ) for a product review. In addition to the battery pack itself, the package included two USB to microUSB cables and a travel pouch.

Left to Right : Travel pouch, battery pack, two cables

Side view
The USB battery pack is rated to handle 4.5A max across two ports.  To test the battery bank, I used a USB meter and near 2A load on each port for a total of almost 4A load across the two ports.  Once the battery pack turned off, I calculated the measured was about 58% of the rated mAh which is a bit lower than average but still not the lowest I have seen.  Once I charge/discharge a few times, that might improve.  The device seemed able to handle the load I placed on it with no problem.

For real world tests, I had no problems charging my tablet and smartphone.  The built-in flashlight is a handy feature - if you need to move around at night, or have a power outage, it is nice to have.

Here are the main points I noticed about this product:

Output Handling: With a rated 4.5A rated output, it should be able to handle two power hungry devices with no problem.

Capacity: With a rated capacity of 13000 mAh, this battery pack should be able fully charge your devices more than once.

Other Features: The travel pouch is a nice way to keep everything together, and the LED flashlight is pretty handy - one of those things you don’t realize you would use until you have it.

Bottom line: If you are looking for a high capacity battery pack with nice features this is a great option.

Amazon Product Page: http://amzn.com/B00MPIGPUY

Wednesday, July 29, 2015

SainSmart Basic Starter Kit for Arduino Review

Disclosure of Material Connection: I received this product for free so that I could provide product feedback to the company and post a product review. I was not required to write a positive review and I do not rate products higher than they should have been. I am disclosing this in accordance with the Federal Trade Commission's requirements.

I recently received a SainSmart Basic Starter Kit for Arduino for a product review. Per the Amazon page, the following items are included:

1x SainSmart UNO R3
1x LM35 Temperature Sensor
1x Infrared Receiver
3x Photoresistor
1x Potentiometer
1x RGB
2x Buzzer
1x USB Cable
4x buttons
1x 74HC595
1x Infrared Remote
2x Tilt sensor
1x Flame Sensor
1x Cell Box
5x Red LEDs
5x Yellow LEDs
5x Green LEDs
2x 1-digital 8 segment
1x 4-digital 8 segment
1x Dot Matrix Display 8x8
8x 220ohm Resistors
5x 1K Resistors
5x 10K Resistors
Breadboard & Jumper wires

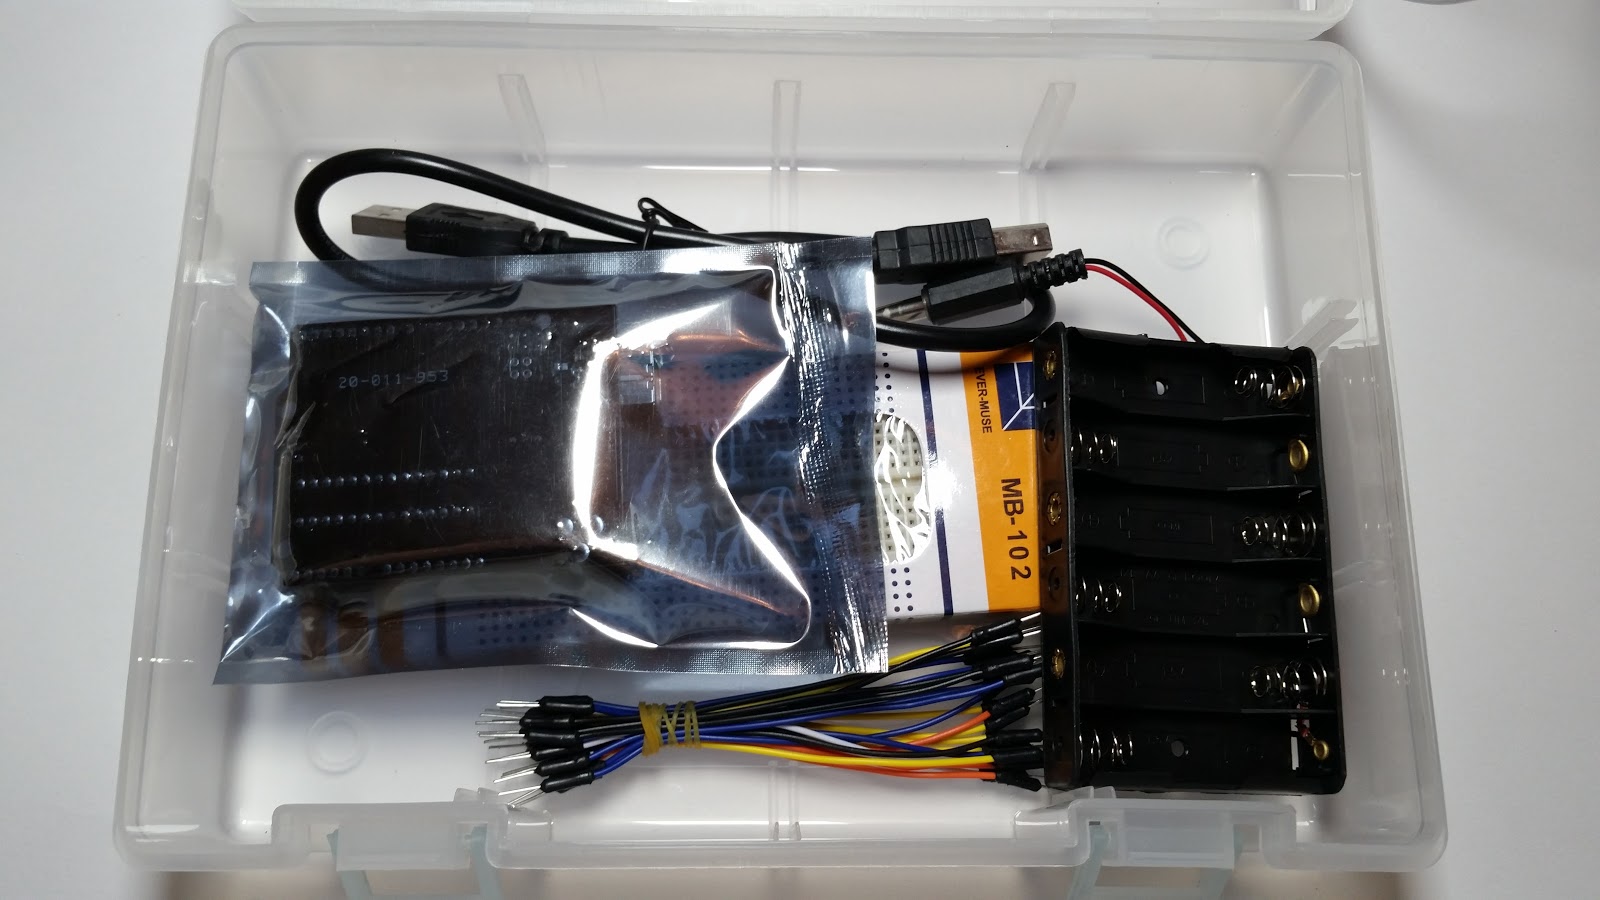
The package came in a nice little plastic box with a tray inside it.  I don’t remember seeing the box in the Amazon pictures, so it was a nice surprise.  I did an inventory, and from what I can tell everything listed was included.  No documentation comes with the kit, so you have to do a little research to figure out the items.  Everything looked to be in good condition, no bent pins or other issues.


I went to the SainSmart website ( http://www.sainsmart.com/ ) which is listed on the Arduino board.  After a little research, it seems to match this item:

http://www.sainsmart.com/starter-kits/uno-r3-smartkits/sainsmart-uno-r3-basic-starter-kit-for-arduino-uno-r3.html

There is a link to a tutorial on that page that is very useful.  The tutorial download includes a PDF manual, and sample code.  I skimmed the manual over and tried two sample projects which explain the code and hardware setup required.  The manual does a good job of explaining the hardware items, which was helpful - for example it explained the difference between the two types of buzzers.


Overall, the tutorial documentation and other documentation on the Aruduino website ( www.arduino.cc ) will help you get a good understanding of the code/software aspect of Arduino and this kit will give you a good range of hardware to learn how to interface and build simple projects.

Update: The Dot Matrix Display 8x8 covers the width of the breadboard when mounted, so it doesn't allow you to put any of the wires in.  Basically you can't use it as-is, you would need a wider breadboard or you would have to directly solder wires.  I let the company know, they are looking into it.  If that is a major issue, I would contact them to see if they can fix it or if they have updated the kit.

Here are the main points I noticed about this product:

Board included: This kit includes a SainSmart UNO R3 board, making it a great starter kit for someone that doesn’t have a board or wants more than one.

Tutorial: The tutorial available from the website is a great way to get familiar with the kit and the types of projects you can do.

Variety: This kit includes a nice range of items to allow for various simple projects to help a person learn about the capabilities of Arduino based systems and how it interfaces with various other electronics.

Bottom line: If you are looking for a basic starter kit that includes everything you need to start learning, this is a great option.

Amazon Product Page: http://amzn.com/B00UV7KAPM